Pencil drawing of a dog: step-by-step description
What follows is a description of how I created a pencil drawing portrait of a dog called Bazzle. Bazzle is a standard poodle clipped short. An honorary member of one my classes, I fell in love with him on sight. A very noble-looking dog – you could easily imagine him immortalised in a statue guarding a stately home or country house - I couldn’t resist trying to capture his likeness in a portrait drawing.
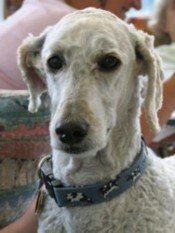
Whether you are drawing a portrait of a dog or a face, the drawing skills needed are exactly the same.
I wanted to do a detailed study of this face but I knew I wouldn’t be able to do this from life (unless he was asleep!) So I took loads of photographs of him – some close-ups, others full body. This was the image I decided I wanted to use to create my pencil drawing portrait.
DRAWING TIPS
|
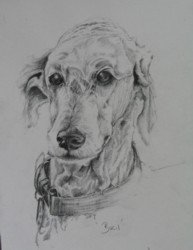
Here is the finished pencil drawing.
click here to get an enlarged view (it will open in a new window) which you might like to keep open as you read through the steps below.
How I Created Bazzle's Pencil Drawing Portrait
MATERIALS
I set up the drawing using a 2B pencil, which tends to be my preferred choice when starting a drawing. However, pencil choice is very personal, so explore what works best for you.
As I worked up the drawing I moved up to a 4B, 6B and even 8B to get really dark darks.
I used a harder HB pencil for some of the more delicate details
I also used an end-of-the-pencil eraser or rubber, a pencil eraser and an eraser shield.
SIZE
Size of finished drawing:
approx 6in x 5in
TIME
The drawing took approximately 2 hours. After I had finished, I left it propped up for a while and just kept on coming back and looking at it – during this period I made a few bits darker or lighter. I also extended the line of the back and the chest as I felt the head was ‘floating’ a bit too much in space.
Step 1
I chose my basic unit in the original photograph – here, the distance between the outer edge of each eye.
Step 2
I lightly marked the outer points of my chosen basic unit on my drawing paper. The eyes are aren’t quite on the horizontal so I checked the mid-line angle through both eyes and carried the angle down to my drawing.
Step 3
I did a quick check to make sure that I would be able to fit the rest of the head in the format or area of paper ie. using the basic unit as my unit of measure, I checked the distance from the eye to the end of the nose in relation to the basic unit; the distance to the top of the head; sides of the head; collar etc.
I lightly marked each of these points in on the paper.
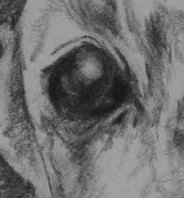
Step 4
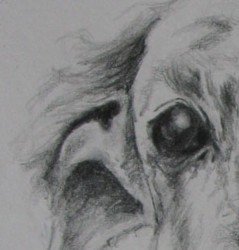
I drew in the shape of the eyes, focusing always on the negative shapes. I noted that the left eye was not as wide as the right eye, which was quite a different shape – more rounded.
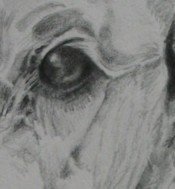
Step 5
Using the negative shapes created by the pattern of light hitting the fur I gradually worked up the drawing.
I focused particularly on shapes that defined the skull:
- the line to the right of the right eye that comes round the skull from the right ear and down to the muzzle (see above).
- the creases and wrinkles around the eye socket.
- the direction of the ‘fur’ at the top of the muzzle – fitting the darker and/or lighter shapes together – a bit like a jigsaw puzzle.
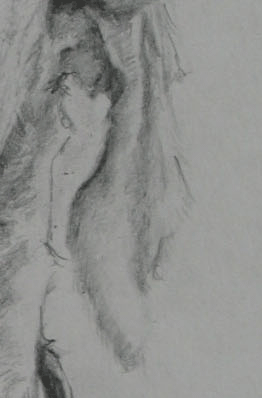
The shape of the folds of the neck were important too in giving structure to the neck and suggesting the softness of the rolls of the fur.
Step 6
I drew in the shapes of the ears by drawing the negative shape around the ear ie. not drawing the ear itself but the space around it.
Also looking for negative shapes inside the ear - the darker areas...
The feathery softness of the fur around the edge of ear is very different in feel from the other edges. I used the harder HB pencil here to get a finer, more wispy line.
I compared how high one ear was in relation to the other.
These quick checks – comparing one part of the drawing to another – are done using a pencil to align across the subject and then bringing it down to the paper. It is not a meticulous measuring but rather a ‘checking in’.
Step 7
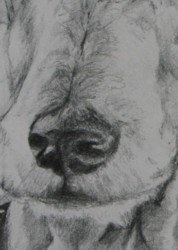
I worked up the eyes and the muzzle/nose.
I was rarely looking at the paper when I was drawing these but instead, looking 80% of the time at the subject. My pencil was just following my eyes. The pressure of my pencil on the paper was varying all the time as I really worked over and round the form. Feeling it three-dimensionally with my pencil.
I was continually darkening and lightening different areas of the drawing – ie. working all over the drawing at the same time rather than working up one area of the drawing at a time.
I used an eraser shield to get highlights in the eye. I placed the shield over the drawn area and used an eraser pencil through one of the dots just to get that dot of highlight.
I deliberately left the area under the muzzle untouched and simply darkened the edge with feathery touches/marks.
Remember that if you want a light area to stand out in a pencil drawing, one way to do this is to darken the surrounding area.
Edges are always important whether you are drawing a dog or a human. Notice how the fur or hair curls around a face or object. Look for shapes - negative shapes - at the ends that will suggest the texture. Look at the direction of fur/hair and notice how this is suggested by light and shade. Create a suggestion of fur/hair and the viewer will fill in the gaps themselves.
Notice how the further away an edge is, the lighter it will be.
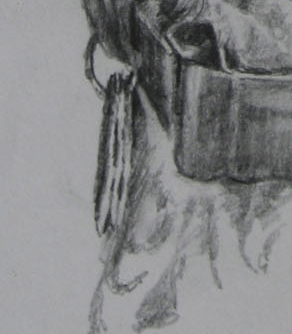
Discs on the collar
I concentrated on drawing the negative shape of the shadow and so got the angle of the discs falling against each other. I used an eraser shield to lighten the highlight on the ring around the collar.
I have to confess I wasn’t particularly happy with the finished collar. However, I've learned that there is almost always something that I'm disatisfied with in every drawing I do! All of us are very quick to judge our own work more harshly than others.
How much to draw is up to you. When doing a portrait pencil drawing I like to draw in a light outline suggesting the rest of the body, here, the beginning of the back and the chest to indicate the pose.
However, this was something I added a couple of hours after finishing the drawing. When I came back to look at it I felt the head was 'floating' a bit and needed the additional sketching in to ground it a bit more.
DRAWING TIPS
|
If you would like to be the one of the first to hear announcements of new courses in the UK, plus get some free drawing tips and other drawing-related information, sign up for our free newsletter Drawing Matters.
